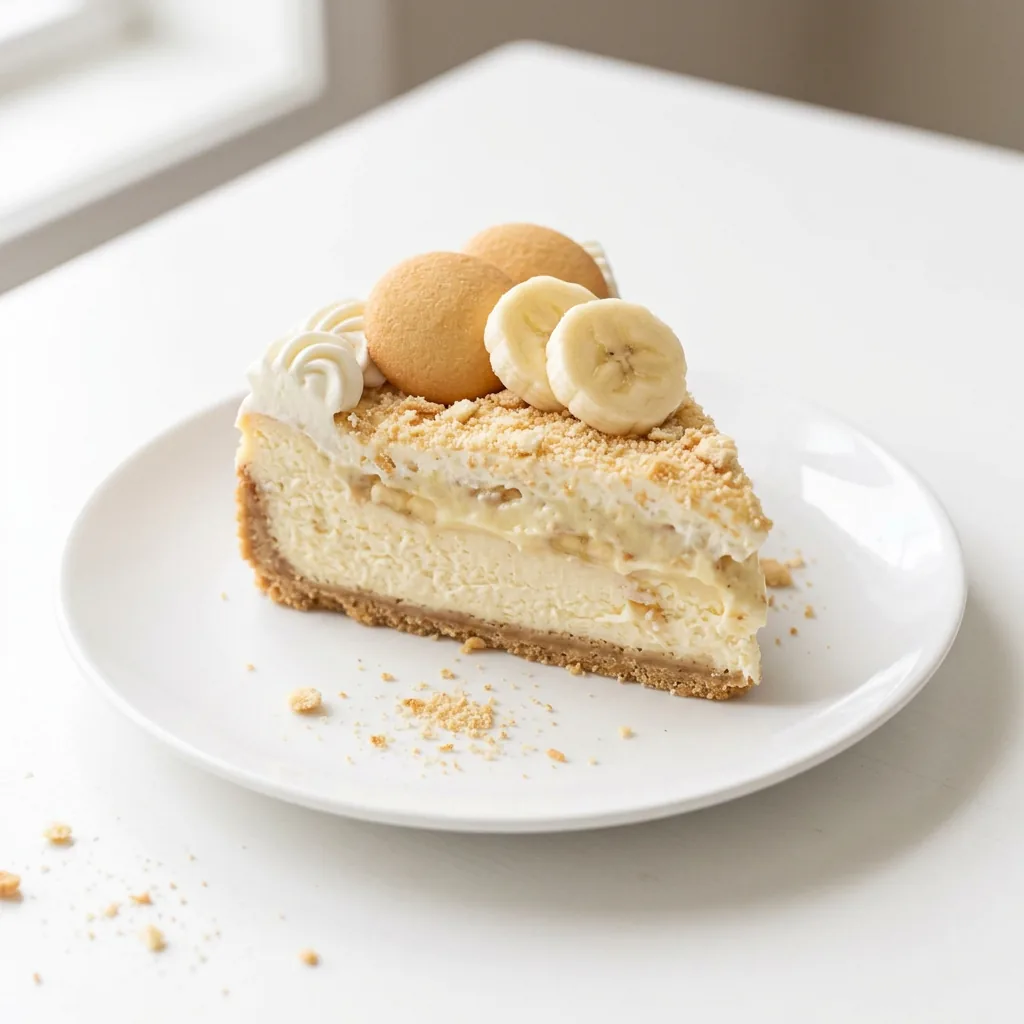
Banana pudding cheesecake is the no-bake dessert that answers the question nobody knew they were asking: what if banana pudding had a cheesecake layer?
Creamy whipped cheesecake sits in a graham cracker crust under a blanket of quick vanilla pudding, fresh banana slices, and a halo of Nilla wafers, all served cold with a crown of whipped cream.
The oven never gets turned on, which makes this the perfect summer dessert, potluck showpiece, and make-ahead crowning glory for Sunday dinner. It is ideal for banana pudding loyalists, cheesecake lovers, and anyone whose kitchen is too hot for baking.
One bowl after another stacks into layers that taste like they took all afternoon. They took twenty-five minutes. That is our secret.
Recipe at a Glance
- Prep time: 25 minutes
- Chill time: at least 6 hours
- Total time: about 6 hours 30 minutes (mostly refrigerator time)
- Servings: 10 slices
- Difficulty: Easy
- Method: No-bake, layered, refrigerated

Ingredients You’ll Need
- 1 graham cracker crust, prepared
- 8 oz cream cheese, softened
- 1/3 cup granulated sugar
- 1 tsp vanilla extract
- 1 cup heavy cream
- 1 (3.4 oz) package vanilla pudding mix (instant, not cook and serve)
- 1 cup whole milk
- 3 bananas, sliced
- 31 Nilla wafers
- Whipped topping, thawed
Ingredient Notes & Easy Substitutions
Cream cheese: Full-fat block cream cheese, genuinely softened, is the backbone of the cheesecake layer. Cold cream cheese leaves lumps that no amount of beating fully repairs, so let it sit out while you gather everything else.
Vanilla pudding mix: Instant pudding, the 3.4 ounce box, whisked straight into cold milk. Cook-and-serve pudding will not set the same way without heat, so read the box before it goes in the cart. This is the same trick behind my heaven in a bowl layered dessert, where instant pudding does the heavy lifting too.
Heavy cream: One cup, whipped to stiff peaks, is what turns dense cheesecake filling into something cloud-like. Whip it separately and fold gently; stirring flattens all that lovely air you just created.
Bananas: Three bananas, sliced just before assembly. Sliced bananas brown when they sit exposed, so they go in last and go straight under the pudding and toppings where they stay golden.
Thirty-one Nilla wafers: An oddly specific number, and I love it: a ring around the edge, a scattered middle, and one for the cook. Use whole wafers for looks or crumble a few if you prefer texture in every forkful.
Graham cracker crust from a box or homemade both work; the crust is the foundation, and prepared is exactly what this recipe wants.
Equipment You’ll Need
- Hand mixer or stand mixer
- Two mixing bowls
- Silicone spatula
- Whisk
- Measuring cups and spoons
- One prepared graham cracker crust (9 inch)
How to Make Banana Pudding Cheesecake
Four layers, one crust, zero baking. It goes bowl by bowl, and each one is easier than the last. Follow with me.
Step One: Beat the Cheesecake Base
Beat the softened cream cheese with the sugar and vanilla until completely smooth, scraping the bowl once or twice along the way.
You are looking for a thick, glossy, lump-free mixture. Taste it at this stage; this is the cheesecake flavor of the whole dessert, and it should already make you happy.
Step Two: Whip and Fold the Cream
In a clean bowl, whip the heavy cream to stiff peaks, then fold it into the cream cheese mixture with a spatula in two additions.
You are looking for a pale, fluffy filling that holds a soft ribbon when the spatula lifts. Folding rather than stirring keeps the air in, and the air is what makes the layer feel like actual cheesecake mousse.
Step Three: Fill the Crust
Spread the cheesecake layer into the prepared graham cracker crust, pushing it into an even layer and smoothing the top.
You are looking for an even surface with no exposed crust peeking through. Give the pan a gentle wiggle to settle everything into the corners.
Step Four: Make the Pudding Layer
Whisk the pudding mix with the whole milk for about two minutes, until it thickens to a soft, spoonable set. Spread it gently over the cheesecake layer.
You are looking for pudding that coats the whisk and mounds softly rather than running. Work quickly once it thickens, because instant pudding sets fast and spreading gets harder by the minute.
Step Five: Top with Bananas and Wafers
Arrange the banana slices over the pudding, then crown the whole thing with the Nilla wafers and a swirl of whipped topping.
You are looking for a full, generous topping with the bananas tucked under the wafers so they stay bright. This is the layer everyone photographs, so have a little fun with the arrangement.
Step Six: Chill Until Set
Refrigerate the pie for at least 6 hours before serving, overnight if you can manage the patience.
You are looking for clean slices that hold their shape when cut. The long chill is not optional; it is when the layers firm up and the wafers soften into that classic banana pudding texture everyone fights over.
Serving Size & Batch Scaling
One pie cuts into 10 slices, which covers a family dessert with a couple of sneaky late-night forkfuls left over. For a crowd, the recipe scales beautifully: two pies sit side by side on a buffet and look intentional.
Because there is no baking, doubling is purely a matter of more bowls. The refrigerator is the only bottleneck, and even a full pie takes up remarkably little real estate.
Serving straight from the dish is the classic move, but for picture-clean squares, chill the pan first and cut with a sharp knife wiped between slices. Twelve neat slices look generous on any dessert table, and nobody needs to know how little effort hid underneath.
Making More or Less?
- 5 servings: Half of every filling layer into a small crust, or two mini crusts. Identical chill time.
- 10 servings: The recipe as written.
- 20 servings: Make two pies, or build it in a 9×13 dish with a pressed graham crust and cut generous squares for a potluck crowd.
For any batch: soften the cream cheese fully, whip the cream separately, and slice the bananas last. Those three habits are the entire difference between good and gorgeous.
Nutrition Estimate Per Serving
The following is an estimated nutritional breakdown per slice (1 of 10), calculated from the ingredients in this recipe. It is an estimate, not medically precise information.
- Calories: ~420
- Protein: 6g
- Carbohydrates: 44g
- Fat: 25g
- Fiber: 1g
- Sugar: 28g
- Sodium: ~270mg
Useful highlight: the bananas bring real potassium to the table, and since this is a no-bake dessert, the whole thing comes together without heating the kitchen a single degree.

Common Mistakes to Avoid
Cold cream cheese. Lumps hide in chilled cream cheese like they pay rent. Soften it properly and the layer turns silky on the first try.
Stirring the whipped cream in. Stirring deflates everything you whipped. Fold with a spatula, gently, like you mean it kindly.
Slicing the bananas too early. Exposed banana flesh browns fast. Slice them straight before assembly so the top stays beautiful.
Skipping the long chill. Cutting at hour two gives you a delicious puddle. Six hours gives you slices; the clock does half the work here.
Using cook-and-serve pudding. Without heat it stays watery. Instant pudding only, and check the box twice.
Troubleshooting Guide
My cheesecake layer is grainy. What happened? The cream cheese was still cold. Let the filling sit at room temperature for fifteen minutes, then beat again; most of the graininess smooths out.
The pudding layer is thin. Can I fix it? Whisk in a second half tablespoon of pudding mix, or simply chill longer; instant pudding often sets more firmly with extra time.
The bananas browned on top. Now what? Tuck them under the whipped topping and wafers next time, or toss the slices in a teaspoon of lemon juice first. The flavor stays; the color stays pale.
My crust cracks when sliced. How can I prevent that? Cut with a sharp knife dipped in hot water and wiped between slices. Clean slices, no cracks, bakery-counter presentation.
Variations & Customizations
Caramel drizzle version: Drizzle two tablespoons of caramel sauce over the bananas before the wafers go on. My caramel apple cheesecake bars prove how well caramel and cheesecake get along.
Mini versions: Build the same layers in a muffin tin lined with wafers for individual cups. Party ready, no slicing required.
Vanilla wafer crust version: Crush Nilla wafers with melted butter for the crust instead of graham crackers. Doubles down on the banana pudding nostalgia.
More banana energy: If the bananas keep multiplying on your counter, slice the ripest one over the top before serving and let the wafers share the spotlight.
This layered build follows the no-bake approach at Num’s the Word, and the four-layer version at Oh Sweet Basil is a lovely next step if you want to go fancier.
What to Serve With It
Sunday dinner: Thick slices, extra whipped topping, coffee on the side. The traditional setting, and still the best one.
Summer cookouts: Straight from the cooler to the table, no oven required all day. It travels like a champion pie.
Dessert spreads: Set it beside my strawberry cheesecake dump cake and watch guests lose the ability to choose. Offer both; let them struggle.
With drizzles: Warm caramel or a spoonful of crushed pineapple for the adventurous. The base handles playful toppings beautifully.
Meal Prep & Make-Ahead Instructions
Can this be made ahead? It is a make-ahead recipe by nature; the six-hour chill is part of the recipe, not an inconvenience. Build it the night before serving and it will be at peak texture exactly when you need it.
The one strategic exception is the top layer: if you want the wafers snappy rather than softened, add them and the whipped topping just before serving. The pie underneath waits happily, covered, for a day and a half.
The assembled pan actually tastes better on day two, once the banana slices have sweetened the pudding and the wafers have softened evenly. Build it after dinner tonight, and tomorrow is already handled.
Storage & Leftovers
Refrigeration: Covered in the pan, the pie keeps for up to 3 days. The wafers soften steadily into pudding-layer texture, which many of us consider the best phase.
Freezing: Not recommended; the dairy layers weep and turn grainy after thawing. This is a fridge dessert through and through.
Leftover ideas: Crumble a slice into a parfait glass with extra whipped topping, or blend a scoop into a milkshake. The cheesecake layer is milkshake gold.
Reheating Instructions
None required: Banana pudding cheesecake is served cold, straight from the refrigerator, and it is never better than that. Warmth would only soften the structure.
If it chilled overnight uncovered: Press a piece of plastic wrap gently on the surface and give it an hour; exposed patches firm right back up.
For clean slices: The hot-knife trick, dipped and wiped between cuts, is the only technique this dessert asks of you.
No microwave, no oven, no drama. This is one dessert that thrives on being left alone in the cold until showtime.
Frequently Asked Questions
Can I use homemade whipped cream instead of whipped topping? Absolutely; whip a cup of heavy cream with two tablespoons of sugar to stiff peaks and use it the same way. The dessert becomes slightly less sweet and slightly more impressive.
How do I keep the bananas from turning brown? Slice them at the last moment and make sure something covers them, whether pudding, topping, or wafers. Contact with air is what browns them; layers are the protection.
Can I make this in a 9×13 dish? Yes, and you will want one and a half times the filling layers over a pressed graham crust. It cuts into generous squares and feeds a crowd beautifully.
Why did my filling not thicken? Nine times out of ten it is cook-and-serve pudding or warm milk. Instant pudding needs cold milk to set; keep both requirements and the layers firm up every time.