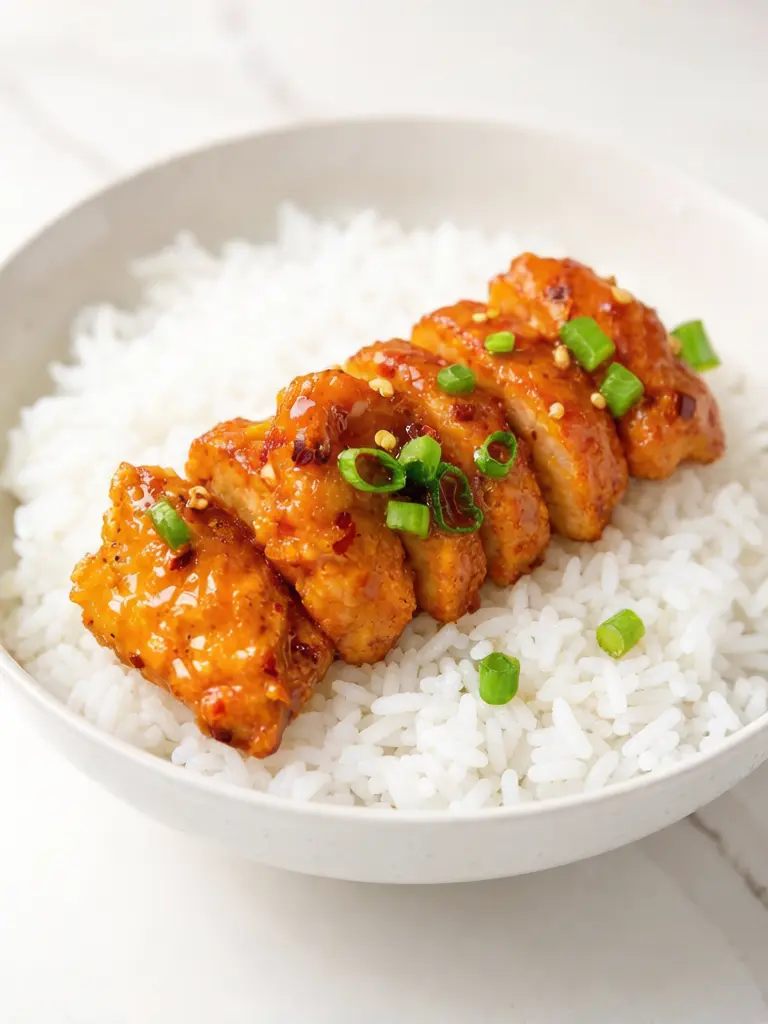
Firecracker chicken delivers the kind of crispy, saucy, sweet-and-spicy bite that usually comes in a takeout container. The chicken gets a double-dip in eggs and cornstarch before frying, which creates a crust that stays crunchy even after a stint in the oven coated in sauce.
That sauce is where the magic happens: buffalo heat, brown sugar sweetness, apple cider vinegar tang, and a velvety swirl of melted butter all come together into a thick, glossy glaze that clings to every piece.
This recipe is for anyone who has been disappointed by soggy sweet-and-spicy chicken. The coating technique here is the key. By dipping the chicken in eggs, then cornstarch, then back into the eggs, you build layers that fry up shatteringly crisp and actually hold that crunch through the baking step.
When the chicken bakes in the sauce, the cornstarch works into the liquid and creates that thick, restaurant-quality glaze that you usually only get from a wok.
The Details at a Glance
- Prep Time: 20 minutes
- Cook Time: 25-30 minutes
- Total Time: 50 minutes
- Servings: 4-6
- Difficulty: Intermediate
- Cuisine: Chinese-American
- Cooking Method: Fried then baked
- Meal Type: Dinner
- Calories: ~480 per serving
- Protein: ~30g
- Carbs: ~38g
- Fat: ~24g
- Freezer Friendly: No (coating softens)
- Best Occasion: Weekend dinner, family meal
What to Expect on Your Plate
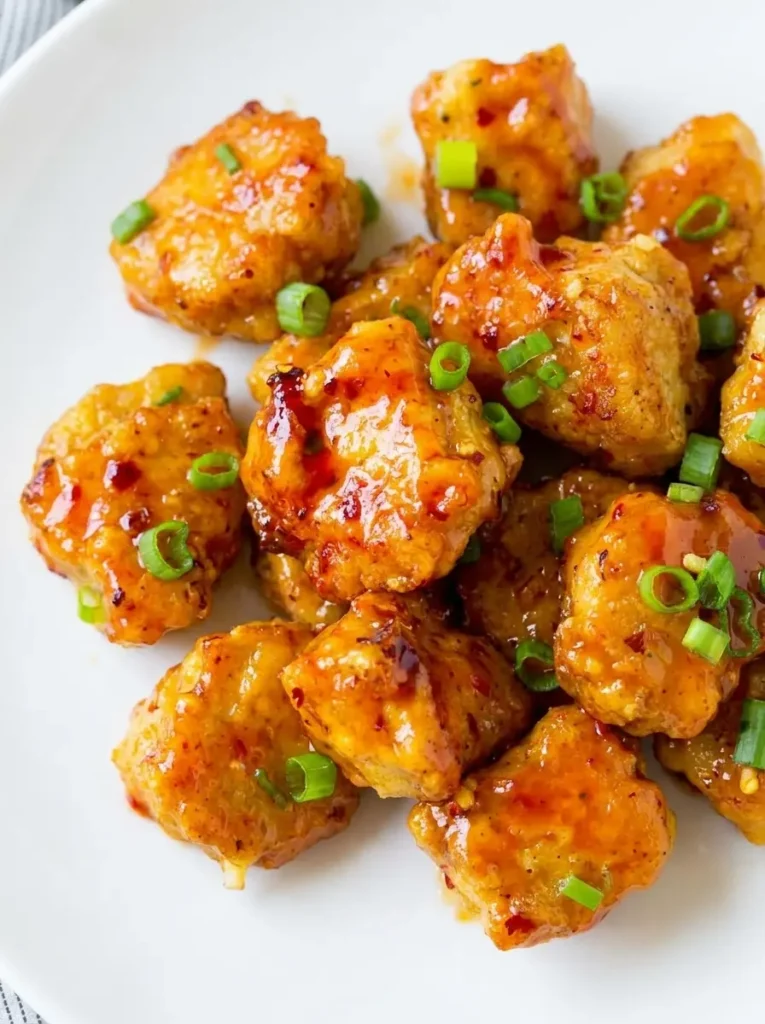
When this comes out of the oven, the chicken pieces are lacquered in a sticky, reddish-orange glaze that glistens. The first bite gives you a crunch from the coating, then the sauce hits with a wave of sweetness followed by a slow-building heat from the buffalo sauce.
The brown sugar rounds out the edges of the spice, the soy sauce adds depth, and the butter makes everything feel rich and smooth on your tongue. The vinegar cuts through the sweetness just enough to keep you reaching for another piece.
The texture contrast is what sets this apart from regular fried chicken. The crust stays crispy underneath the sauce, the chicken inside stays juicy, and the glaze thickens into a jammy coating that you want to scrape off the baking dish. Served over steamed white rice, the rice soaks up any extra sauce and turns into its own reward.
Ingredients You’ll Need
- Boneless skinless chicken breast or thighs (1.5 lbs): Cut into 2-inch pieces. Breasts give you leaner, cleaner bites. Thighs stay juicier and are more forgiving if you accidentally cook them a minute too long. Either works, so go with what you prefer.
- Salt and pepper: For seasoning the chicken before coating.
- Eggs (3, whisked): The binding layer that makes the cornstarch stick. Whisking vigorously until you see small air pockets develops the eggs and creates a lighter, crispier coating.
- Vegetable oil (1 cup, plus more as needed): For shallow frying. You need about an inch of oil in your pan. Vegetable oil has a neutral flavor and a high smoke point, which is exactly what you want for frying.
- Cornstarch (1/2 cup): The secret to the shatteringly crisp coating. Cornstarch fries up lighter and crispier than flour, and it also thickens the sauce during baking.
- Buffalo sauce (1/2 cup): The base of the firecracker sauce. It brings vinegar tang and medium heat. Frank’s RedHot is the classic choice, but any buffalo-style sauce works.
- Packed light brown sugar (1 cup): Balances the heat from the buffalo sauce and contributes to that thick, glossy glaze as it bakes.
- Apple cider vinegar (2 teaspoons): Adds brightness and tang that cuts through the richness of the butter and sugar.
- Butter (1 tablespoon, melted): Stirs into the sauce for a smooth, velvety finish. It rounds off the sharp edges of the buffalo sauce and makes the glaze cling to the chicken.
- Soy sauce (1 teaspoon): A hit of umami that adds depth without making the dish taste Asian in a specific way. It just makes everything taste more complete.
- Garlic powder (1 teaspoon): Adds savory flavor to the sauce without the risk of fresh garlic burning during the bake.
- Chili powder (1/2 teaspoon, optional): For extra heat if you want more fire than the buffalo sauce alone provides. Skip it if you prefer mild.
- Mustard powder (1/2 teaspoon): A flavor enhancer you do not taste directly, but it makes all the other flavors pop. Think of it as the seasoning equivalent of turning up the contrast on a photo.
- Salt (1/2 teaspoon): For the sauce.
For serving, you will want steamed white rice, vegetable fried rice, or your favorite stir-fried vegetables. Check out more chicken recipes for ideas on what to pair with this.
Smart Swaps
- Chicken thighs instead of breasts: Thighs are the safer choice if you are worried about overcooking. The extra fat keeps them juicy, and the darker meat stands up better to the bold sauce.
- Less heat: Use only 1/4 cup of buffalo sauce and increase the brown sugar to 1.25 cups for a milder, sweeter version that kids will eat without complaint.
- More heat: Add the chili powder and consider a few drops of hot sauce or a pinch of cayenne to the sauce for a genuinely fiery version.
- Air fryer method: After the initial frying step, you can finish the chicken in an air fryer at 375°F for 8 to 10 minutes instead of the oven. The glaze will not thicken quite as much, but the coating stays very crispy.
- Cornstarch alternatives: If you do not have cornstarch, potato starch works as a substitute with nearly identical results. Do not use flour, which creates a heavier, less crisp coating.
Gear You Need
- Large heavy-bottomed skillet or Dutch oven: For frying the chicken. Heavy bottoms distribute heat evenly so the oil temperature stays consistent.
- Wire cooling rack: For draining the fried chicken. A rack keeps air circulating underneath so the bottom stays crispy. Paper towels trap steam and make the bottom soggy.
- 9×13 baking dish: For the oven step where the sauce and chicken come together.
- Tongs: For flipping the chicken during frying and tossing it in the sauce.
- Mixing bowls: One for the whisked eggs, one for the cornstarch, and a large one for the sauce.
- Candy or frying thermometer (optional but helpful): To check that your oil hits 365°F for optimal frying.
Cooking This Step by Step
While your finished dish may not look exactly like the images in this post, following these instructions will give you the same delicious FIRECRACKER CHICKEN RECIPE. So please follow with me!
Start by making the sauce so it is ready when the chicken comes out of the fryer. In a large bowl, whisk together the buffalo sauce, brown sugar, apple cider vinegar, melted butter, soy sauce, garlic powder, chili powder if you are using it, mustard powder, and salt. Set it aside. The sugar will not fully dissolve yet, but that is fine. It melts and thickens during baking.
Preheat your oven to 350°F.
Cut the chicken into 2-inch pieces and pat them completely dry with paper towels. This is not a step to rush. Wet chicken means the coating slides off instead of sticking, and you end up with bare patches that fry unevenly. Season the pieces with salt and pepper on all sides.
Whisk the eggs vigorously in a medium bowl until they are very uniform in color and you see small air pockets developing on the surface. This takes about 30 seconds of energetic whisking. The more air you incorporate, the lighter and crispier the coating will be. Add the chicken pieces and toss to coat them thoroughly in the egg.
Heat the vegetable oil in your skillet over medium-high heat until it reaches 365°F. If you do not have a thermometer, test the oil by dropping in a tiny piece of coated chicken. It should sizzle immediately and vigorously without smoking. If the oil smokes, it is too hot. Turn it down and wait a minute.
Just before frying each batch, dredge the chicken pieces in cornstarch, then briefly dip each piece back into the whisked eggs. This double-dip is what creates the extra-crispy coating. The first egg layer helps the cornstarch adhere, and the second egg layer creates an additional protein layer that fries into a crunchy shell. Work in small batches so you do not crowd the pan.
Fry the chicken in batches, leaving room around each piece so the edges get crispy. If the pieces are touching, they steam instead of fry, and you get soft spots instead of an even crust. Flip once the bottom is light brown and crisp, about 3 to 4 minutes per side.
Adjust the heat as needed throughout cooking. The oil temperature will drop when you add cold chicken, so you may need to turn the heat up slightly between batches.
Use a slotted spoon or tongs to carefully remove each batch and place the pieces on a wire cooling rack with wax paper or parchment underneath to catch drips. Do not use paper towels, which trap steam and soften the coating on the bottom.
Once all the chicken has been fried, add it to the large bowl with the sauce and gently toss to coat every piece. Transfer the saucy chicken to your 9×13 baking dish in a single layer. Scrape any remaining sauce from the bowl over the top. For another crispy chicken recipe, try our baked orange chicken.
Bake for 10 minutes. Remove the dish and gently toss the chicken to redistribute the sauce. The glaze will already be thickening and the coating will have softened slightly, which is normal. Bake for another 10 minutes.
The sauce should now be thick, glossy, and clinging to the chicken in a shiny glaze. The chicken is fully cooked and the coating has absorbed some of the sauce while maintaining a satisfying bite.
Remove from the oven, garnish with sliced green onions, and serve immediately over steamed white rice. The rice is not optional in the sense that you really want something to soak up the extra sauce in the bottom of the dish.
According to Serious Eats’ guide to frying chicken, the double-coating technique used here is one of the most reliable ways to achieve a crust that stays crisp even under sauce.
The Numbers Per Serving
Per serving (about 1/5 of the recipe, without rice):
– Calories: ~480
– Protein: ~30g
– Carbs: ~38g
– Fat: ~24g
– Fiber: ~0g
– Sugar: ~28g
– Sodium: ~750mg
Adding a cup of steamed white rice adds approximately 200 calories and 45g of carbs.
Kitchen Wisdom
- Do not skip the double-dip. The egg-cornstarch-egg sequence is what makes this recipe work. Skipping the second egg dip results in a thinner, less crispy coating that dissolves into the sauce during baking.
- Fry in small batches. Overcrowding the pan drops the oil temperature and produces greasy, soft chicken instead of crispy chicken. Four to five pieces at a time is the sweet spot in a 12-inch skillet.
- Use a wire rack for draining. This is the difference between crispy all over and crispy on top but soggy on the bottom. If you do not have a wire rack, use a slotted spoon to prop the chicken up slightly on a plate.
- The sauce thickens during baking, not before. Do not worry if the sauce looks thin when you first toss the chicken in it. The cornstarch from the coating slowly works into the sauce during the bake and creates that thick glaze. This is by design.
When Things Go Off Track
- The coating fell off during frying: You probably did not pat the chicken dry enough before the egg dip, or you flipped the pieces too early. Wait until the bottom is fully set and light brown before turning. If the oil is not hot enough, the coating takes too long to set and slides off.
- The chicken is not crispy after baking: This happens if the chicken was not fried long enough initially, or if you skipped the wire rack and let the fried pieces sit on paper towels, which softens the coating. Also, make sure you bake at 350°F, not higher. A higher oven temperature softens the coating faster.
- The sauce is too thin: You may not have used enough cornstarch on the chicken. The cornstarch from the coating is what thickens the sauce in the oven. Next time, make sure the chicken is thoroughly coated before frying. You can also add a slurry of 1 teaspoon cornstarch mixed with 1 tablespoon water to the sauce before baking.
- The sauce is too spicy: Add another tablespoon of brown sugar and a small pat of butter. Both mellow the heat. You can also serve it with extra rice, which dilutes the spice per bite. For more saucy chicken inspiration, browse our dinner recipes.
Ways to Make It Yours
- Firecracker shrimp: Swap the chicken for large peeled shrimp. Fry for 2 to 3 minutes per side instead of 3 to 4, and reduce the bake time to 8 minutes total (4 minutes, toss, 4 minutes).
- Air fryer shortcut: After coating the chicken in eggs and cornstarch, spray the pieces with oil and air fry at 400°F for 10 to 12 minutes, flipping halfway. Then toss in the sauce and bake for just 5 minutes to thicken the glaze.
- Meal prep version: Fry and bake the chicken, then store the chicken and sauce separately. Reheat the chicken on a wire rack in a 350°F oven for 8 minutes, then toss with warmed sauce right before eating.
- Gluten-free: This recipe is naturally gluten-free as written, since cornstarch replaces flour. Just double-check your buffalo sauce and soy sauce labels to confirm they are gluten-free.
What to Serve Alongside
Steamed white rice is the natural choice and honestly the best one, because the rice absorbs that incredible sauce. Vegetable fried rice is even better if you want more substance in the bowl. Steamed broccoli or a quick stir-fry of snap peas and bell peppers adds freshness and crunch that balance the rich, sweet chicken.
For a lighter side, a simple cucumber salad with rice vinegar and sesame oil cuts through the sweetness. If you are feeding a crowd, set out the chicken with rice, steamed veggies, and extra buffalo sauce on the side so people can adjust their own heat level. Check out our garlic butter chicken for another takeout-style dinner option.
Making Leftovers Last
Store leftovers in an airtight container in the refrigerator for up to 3 days. The coating will soften as it sits in the sauce, which is inevitable but does not affect the flavor at all. In fact, many people think the chicken tastes better the next day because the flavors have had time to meld.
To reheat and get some crispness back, spread the chicken on a wire rack set over a baking sheet and warm in a 350°F oven for 10 to 12 minutes. The microwave is faster but produces softer chicken. If you go the microwave route, 60 to 90 seconds is usually enough.
This recipe does not freeze well. The coating becomes gummy when thawed, and the sauce separates. If you want to freeze components separately, freeze the sauce in a jar and the uncooked, coated chicken pieces in a freezer bag, then fry and bake from thawed when you are ready.
Questions People Ask
Can I bake the chicken instead of frying it?
You can, but you lose the signature crunch. If you want to avoid frying, coat the chicken as directed, place it on a greased wire rack over a baking sheet, spray with oil, and bake at 425°F for 15 to 18 minutes. The texture will be closer to baked chicken tenders, which is still good, just different from the crispy fried version.
How spicy is this?
Moderate. The buffalo sauce provides a noticeable but manageable heat that the brown sugar and butter soften significantly. If you are sensitive to spice, use 1/4 cup of buffalo sauce. If you love heat, add the chili powder and consider tossing in a pinch of cayenne.
Can I use flour instead of cornstarch?
You can, but the result will be heavier and less crispy. Cornstarch creates a lighter, more delicate crust that stays crisp longer. Flour-based coatings soften faster in sauce. If cornstarch is not available, potato starch is the best alternative.
What is the best way to tell when the oil is ready for frying?
A frying thermometer is the most reliable method. Heat the oil to 365°F. Without a thermometer, drop a small cube of bread into the oil. If it sizzles and turns golden brown in about 60 seconds, the oil is ready. If it browns in under 30 seconds, the oil is too hot. If it just sits there, the oil needs more time.
Can I make the sauce ahead of time?
Absolutely. Whisk all the sauce ingredients together and store in the refrigerator for up to a week. The butter will solidify, but it melts again when you toss the hot chicken in or warm the sauce gently on the stove.
According to the USDA’s safe food handling guidelines, cooked chicken with sauce keeps safely for 3 to 4 days refrigerated.
5 thoughts on “FIRECRACKER CHICKEN RECIPE”
Comments are closed.