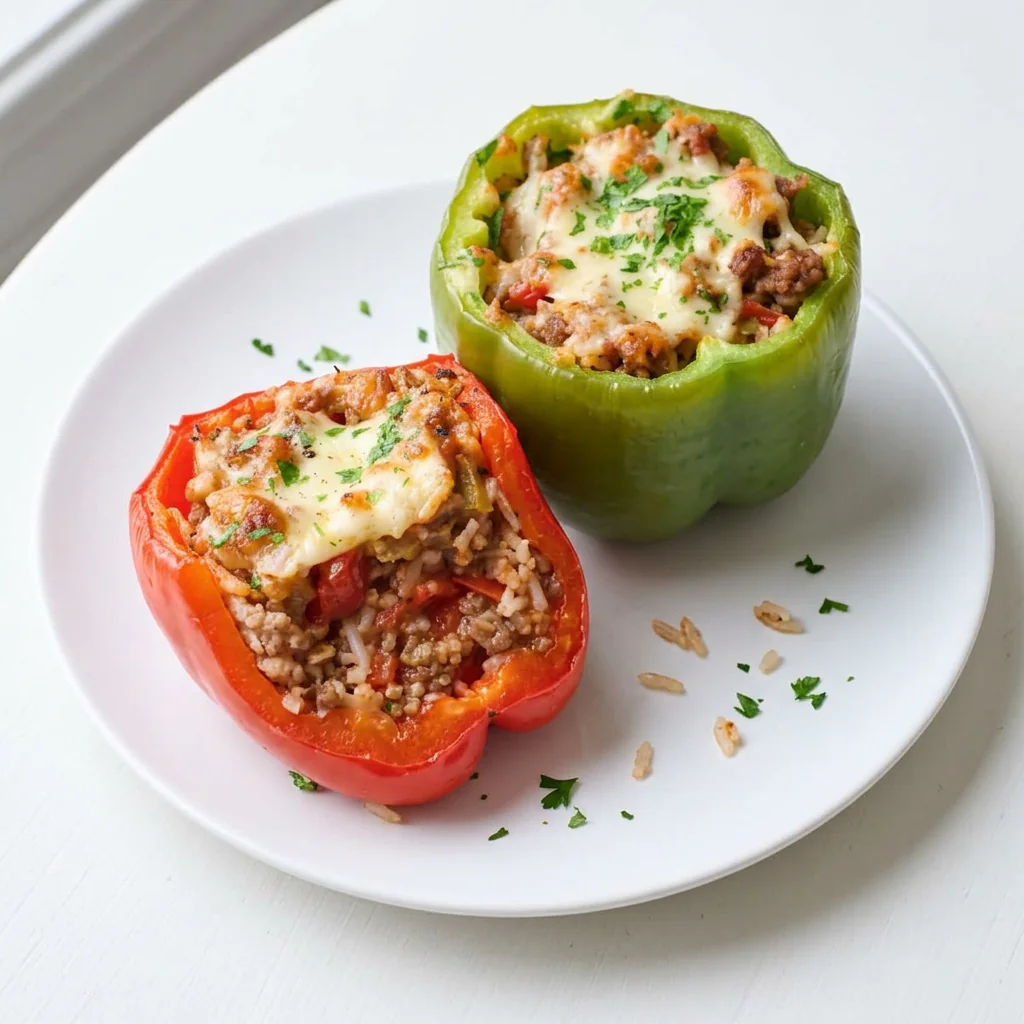
Stuffed bell peppers with rice and meat are the dinner that eats like a present: six whole bell peppers, tops off and seeds out, filled with a savory mix of seasoned ground beef, tender rice, and tomato
sauce, then baked at 350 degrees under a blanket of sauce until the peppers turn silky and the mozzarella on top melts into gold. One dish, six edible bowls, no complaints.
The trick is the sauce split in two: half mixed into the filling so every bite is juicy, half poured over the peppers so they steam tender under foil. It is ideal for family dinners, meal prep, using up the pepper drawer, and anyone who believes dinner is more fun when it comes in its own packaging.
Recipe at a Glance
- Prep time: 20 minutes
- Cook time: 45 minutes
- Total time: about 1 hour 5 minutes
- Servings: 6
- Difficulty: Easy
- Method: Skillet filling, covered bake, cheese finish
Ingredients You’ll Need
- 6 bell peppers
- 1.5 lbs ground beef
- 1 onion, diced
- 2 cloves garlic, minced
- 1 cup cooked rice
- 1 (15 oz) can tomato sauce
- 1 tsp Italian seasoning
- 1/2 tsp salt
- 1/4 tsp pepper
- 1 cup shredded mozzarella cheese
- Fresh parsley, for serving
Ingredient Notes & Easy Substitutions
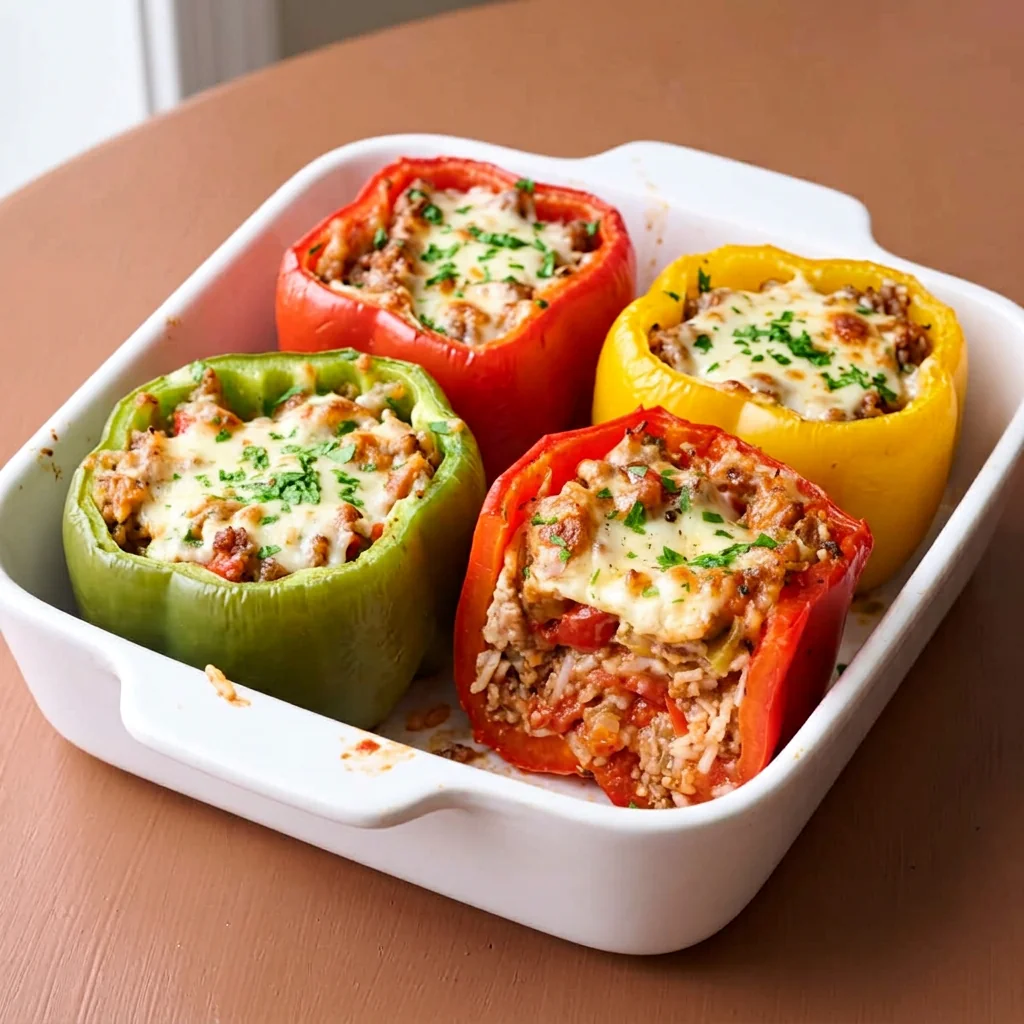
Bell peppers: Six medium peppers with flat bottoms stand upright best; look for peppers that sit level on the counter before committing to them. Red, orange, and yellow are the sweetest, green are the classic grassy bite, and a mixed rainbow tray makes the baking dish look like a centerpiece.
Ground beef: A pound and a half fills six peppers generously. Ground turkey or chicken swaps directly; season a touch bolder since they run quieter, and drain the fat well either way so the filling holds together instead of greasing the dish.
Cooked rice: One cup of already cooked rice, white or brown, leftover rice being the traditional fuel of stuffed pepper night. The rice stretches the beef and soaks up the tomato; freshly cooked or day old both behave identically here.
Tomato sauce: One 15 ounce can, split into two jobs: half in the filling, half over the top. This division is the whole moisture plan for the bake, so resist dumping it all in the skillet.
Mozzarella: One cup, added only at the end so it melts into a stretchy cap rather than baking into leather. Provolone or an Italian blend substitutes cleanly; cheddar takes it in a comfort food direction that nobody has ever protested.
Equipment You’ll Need
- 9×13 inch baking dish
- Large skillet
- Sharp knife and cutting board
- Wooden spoon
- Aluminum foil
- Box grater, if shredding your own cheese
How to Make Stuffed Bell Peppers with Rice and Meat
Prep the peppers, brown the filling, stuff, sauce, bake covered, cheese, finish. The oven does the tenderizing. Follow with me.
Step One: Prep the Oven and the Peppers
Preheat the oven to 350 degrees F. Cut the tops off the peppers and remove the seeds and membranes, then stand them in a baking dish that holds them snugly.
You are looking for hollowed peppers with clean white ribs removed and flat cut tops saved for crumbling over the filling later if you like. A snug dish keeps them upright through the bake; a pepper that tips over is a pepper that cooks unevenly.
Step Two: Brown the Filling
Brown the ground beef with the diced onion and garlic in a large skillet over medium heat, breaking the meat into crumbles as it cooks. Drain the fat.
You are looking for fully browned, crumbly beef with the onion translucent and the garlic fragrant. Drain thoroughly; the filling needs to be hearty, not wet, or the peppers turn soupy in the oven.
Step Three: Season the Filling
Stir in the cooked rice, half of the tomato sauce, the Italian seasoning, salt, and pepper. Cook for two minutes so the flavors knit together, then taste and adjust.
You are looking for a moist, cohesive filling that holds a scoop shape, seasoned slightly boldly since the peppers will mellow it. This taste test is your only chance to fix the filling before it is sealed inside its pepper; make it count.
Step Four: Stuff the Peppers
Spoon the meat and rice mixture into each pepper, filling them to the top and pressing gently so they are packed but not compacted. Arrange them in the baking dish.
You are looking for six generously filled peppers sitting level and proud. A firm but gentle pack means each pepper eats as one cohesive serving instead of collapsing into a pile when cut.
Step Five: Sauce, Cover, and Bake
Pour the remaining tomato sauce over and around the peppers, cover the dish with foil, and bake at 350 degrees F for 35 minutes.
You are looking for the sauce pooling around the pepper bases, which steams them tender under the foil. This covered stage is where raw peppers become silky ones, so trust it and keep the lid on.
Step Six: Cheese and Finish
Uncover the dish, top each pepper with mozzarella, and bake 10 more minutes, until the cheese is melted and lightly golden. Shower with fresh parsley and serve hot.
You are looking for bubbling cheese caps and peppers that yield easily to a fork pressed into the side. Serve them whole with the pan sauce spooned around the bases; the dish goes to the table looking exactly like the comfort it is.
Serving Size & Batch Scaling
One pepper per person feeds 6, and hearts of two will fight over the sixth. The recipe doubles into two dishes for gatherings; assemble both at once and bake them together on staggered racks, rotating once during the covered stage.
They also reheat remarkably well, which makes a double batch a genuine week’s worth of lunches that never see a drive thru.
Making More or Less?
- 3 servings: Three peppers with two thirds of the filling; the bake times hold in an 8×8 dish.
- 6 servings: The recipe as written.
- A crowd: Two 9×13 dishes, twelve peppers, filling divided evenly; bake both and hold one covered while the first disappears.
For any batch: level peppers, drained beef, sauce split in two, foil for tenderness, cheese at the end. Those five rules build the same dinner every time.
Nutrition Estimate Per Serving
The following is an estimated nutritional breakdown per serving (1 of 6 stuffed peppers), calculated from the ingredients in this recipe. It is an estimate, not medically precise information.
- Calories: ~400
- Protein: 28g
- Carbohydrates: 22g
- Fat: 22g
- Fiber: 3g
- Sugar: 7g
- Sodium: ~720mg
Useful highlight: each pepper delivers a full serving of vegetables, real protein from the beef, and vitamin C from the pepper itself; dinner literally comes in its own produce packaging.
Common Mistakes to Avoid
Skipping the drain on the beef. Greasy filling leaks into the dish and the peppers float instead of roast. Drain like the dinner depends on it, because it does.
All the sauce in the filling. The top half of the can is what steams the peppers tender; without it they bake up wrinkled and tough. Split the sauce, always.
Cheese too early. Forty five minutes of baking turns mozzarella into a rubber lid. The final ten minutes is its whole job.
Overstuffed and unpacked. Loose filling spills out as the peppers soften; a gentle press settles it into a filling that eats clean.
Troubleshooting Guide
My peppers are still firm after 45 minutes. Why? Thick walled peppers or a crowded dish that blocks the steam. Re-cover and give them 10 more minutes; a fork through the side should slide with no resistance.
The filling is bland. It needed the taste test at step three. Rescue move: spoon a little of the pan sauce over each pepper and finish with salt and parsley; the sauce carries seasoning beautifully.
The peppers tipped and spilled. The dish was too roomy. Next round, choose a dish where they lean on each other, or trim a paper thin slice from each base so they stand flat.
Can I parboil the peppers first? You can blanch them 3 minutes for a softer result, but the covered bake already handles that; parboiling is the shortcut for very thick walled peppers only.
Variations & Customizations
Mexican version: Swap the Italian seasoning for cumin and chili powder, use pepper jack, and finish with cilantro; the peppers head south of the border happily.
Rice free version: Replace the rice with riced cauliflower for a low carb filling; the volume and moisture behave almost identically.
Orzo version: Cooked orzo in place of rice turns the filling Italian and slightly dressy; same cup, same everything else.
Dinner table neighbors: My creamy smothered chicken and rice keeps the rice night going on the chicken side, and my southern green beans are the classic green beside a dish like this.
The sauce split and covered bake structure here follow the ground beef stuffed peppers at Balancing Motherhood, and the mozzarella topped, beef and rice build at Cooked by Julie backs the same 350 degree family used above.
What to Serve With It
One pepper is the plate: Protein, rice, and vegetable all live in the same wrapper; this is dinner with its own architecture.
Simple sides: A green salad or garlicky green beans are all the support a pepper needs.
Bread people: Warm crusty bread for the tomato sauce pooling in the dish; that sauce is quietly the best part.
Potluck plan: They travel in the baking dish, reheat in the host’s oven, and look impressive the entire time, which is the whole potluck trifecta.
Meal Prep & Make-Ahead Instructions
Can this be made ahead? Fully, and it is one of the best make ahead dinners there is: stuff the peppers up to a day early, refrigerate covered, and add 10 minutes to the covered bake since they go in cold. Add the cheese fresh at the final bake either way.
The filling also doubles and freezes on its own for a future pepper night that assembles itself in ten minutes.
Storage & Leftovers
Refrigeration: Airtight, the baked peppers keep 4 days and reheat like they were just made.
Freezing: Freeze baked peppers individually wrapped up to 3 months; thaw overnight and reheat covered at 350 degrees F for about 20 minutes, cheese refreshed for the last few.
Leftover ideas: Chop a cold pepper over greens for an instant stuffed pepper salad, or pull the filling out and crisp it in a skillet for a beef and rice hash topped with a fried egg.
Reheating Instructions
Oven (best method): Covered at 350 degrees F for 15 minutes warms a pepper through while keeping it tender, cheese refreshed uncovered for the last 3.
Microwave (single pepper): Ninety seconds to two minutes, covered; the pepper steams back to life and only the cheese top loses a little crisp.
Skillet trick: A pepper halved and warmed cut side down in a covered pan crisps the filling edges beautifully for round two.
Frequently Asked Questions
Do I need to boil the peppers before stuffing? No; the covered bake with sauce steams them tender in the oven. Blanching first is only worth it for extra thick walled peppers you want very soft.
Can I use uncooked rice in the filling? Stick with cooked; raw rice needs far more liquid and time than the peppers can give without turning to mush. The one cup cooked is measured after cooking.
How do I keep the peppers upright? A snug dish where they lean on each other, or trim a whisper thin slice from each base to create a flat bottom. Both tricks work; together they never fail.
Can I freeze them before baking? Yes; wrap the stuffed raw peppers well and freeze up to 3 months. Bake from thawed with the usual times, or from frozen with about 25 extra covered minutes.
And that is the whole dish: six rainbow bowls of savory beef and rice, tender from their sauce bath and capped in melted mozzarella. It looks like effort, costs very little, and reheats like a dream, which is the rarest triple in weeknight cooking. Stuff a pan this week; dinner gets an upgrade it did not see coming.